
How To: Makeup For Glasses and Spectacles
this is a response to a request after i posted a photo of me wearing glasses on my instagram one day. i never thought what i know about makeup for glasses would be sought after by others! so here is my tips and tricks whenever i have to wear my glasses.
it's all about brightening. this time, it's more than just using the regular highlighter (pearly/shimmery powder). we need to up it a notch by playing with the intensity of light directly - to influence the lightness on the centre of your face. you can achieve it by using a pinkish-toned highlighting pen, or a concealer/foundation that is one shade lighter than your original skin tone. pink undertone brightens better especially on people with yellow skin like me.
for the refreshing look (as glasses tend to make me look tired), i threw in a flirty winged eyeliner and a super vibrant (but juicy) lips. the gloss helps to take some age off that strong colour.
watch the video here!
PRODUCTS USED____________________________________________________________
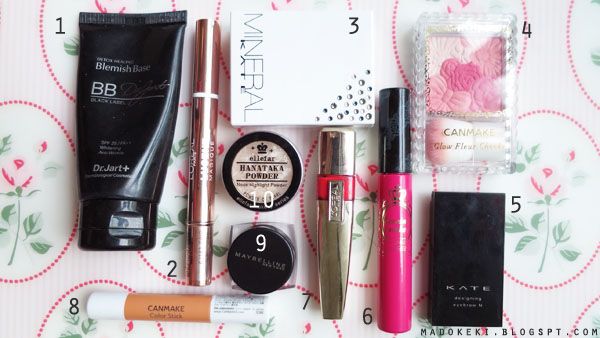
from left to right, clockwise:
1. dr jart+ detox healing black label bb cream
2. l'oreal lucent magique highlighting pen (01 fair)
3. kate mineral foundation powder (OC-B)
4. canmake glow fleur cheeks 04
5. kate designing eyebrow N (EX-4)
6. heroine make volume and curl mascara (black)
7. l'oreal shine caresse 801 princess
8. canmake color stick 09
9. maybelline eye studio gel eyeliner (black)
10. daiso ellefar nose highlighting powder (pink)
BRUSHES
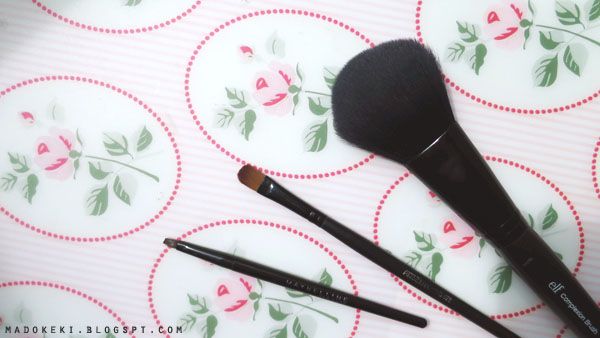
from left to right
1. maybelline eyeliner brush
3. generic eyeshadow brush (i highly suspect it's a concealer brush) i got from sasa.
3. elf studio complexion brush
PICTORIAL_________________________________________________________________
STEP 1. BASE MAKEUP
FOUR STEPS to achieving a base makeup well suited for glasses:
1. foundation - even out skin tone and brighten skin subtly. AVOID spots where the glasses rest on your face - the side of your nose bridge - so that your glasses won't slide off your nose, nor will it be stained with your foundation.
2. colour correct - most girls have dark circles since we have thinner skin. FINE! just make sure to colour correct before further concealing so as to prevent greyish looking undereye area.
3. brightening - brighten up the centre of the face so that it stands out from behind the glasses.
4. powder - use a powder to set the concealer, AND the side of your nose bridge too to absorb any oils/sweat that you may produce.
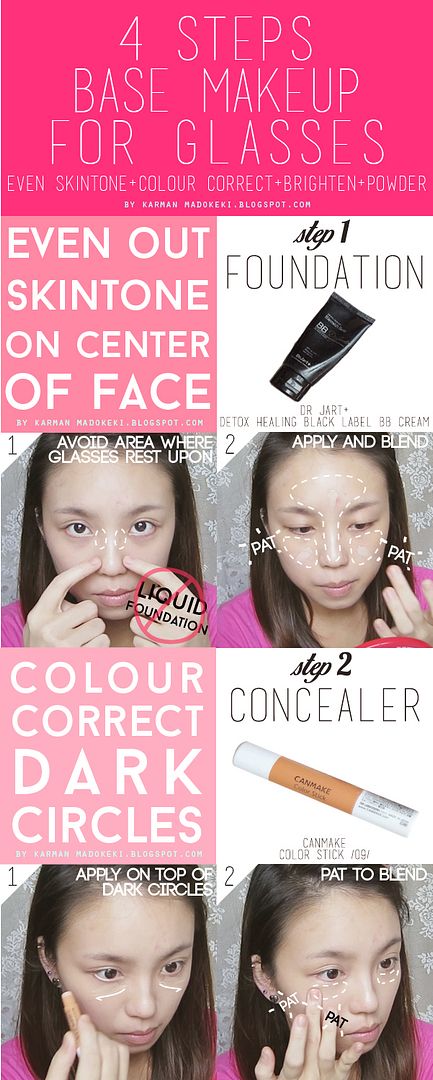
click on image to enlarge!for more information on colour correcting and concealing, watch my tutorial on that.
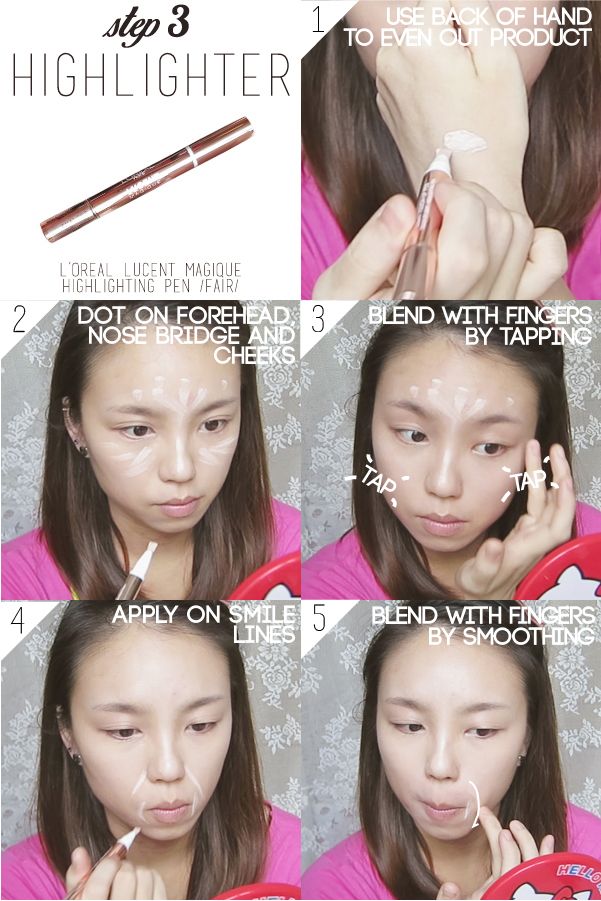
click on image to enlarge!
it's a personal preference thing when it comes to blending out the product on the back of your hands. i didn't find the pen to be dispensing the product evenly enough for me, i ended up with globs of product on my face and i didn't like it. a workaround is to place that glob on my hand and spread it out thoroughly throughout the pen before drawing on my face. i feel like an avatar character with all that on my face.
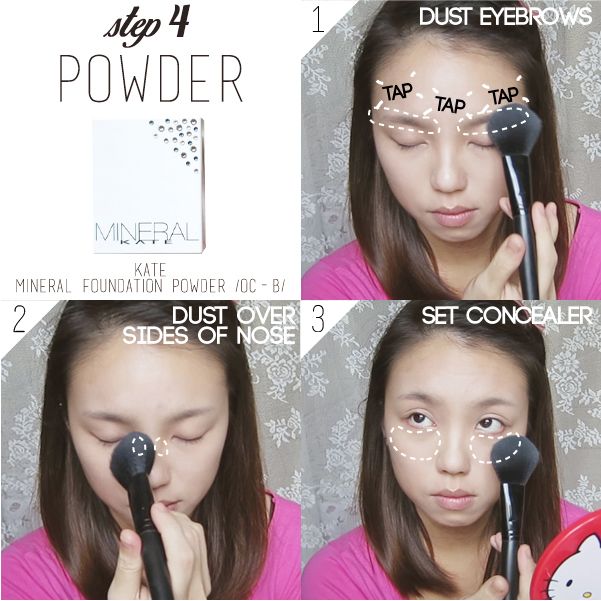
click on image to enlarge!
STEP 2. EYE MAKEUP
there's nothing new with how i draw my eyebrows, but just in case you haven't seen how i do it before, here's a rather detailed version :) i'm always using kate's designing eyebrow because that's the only brow product i have. of course you can use any matte brown eyeshadow that will suit your hair colour!
i thought a slightly arched brow will help with the awake look. also, since the frames are already pretty horizontal, i want to add some angles to my brows to differentiate it.
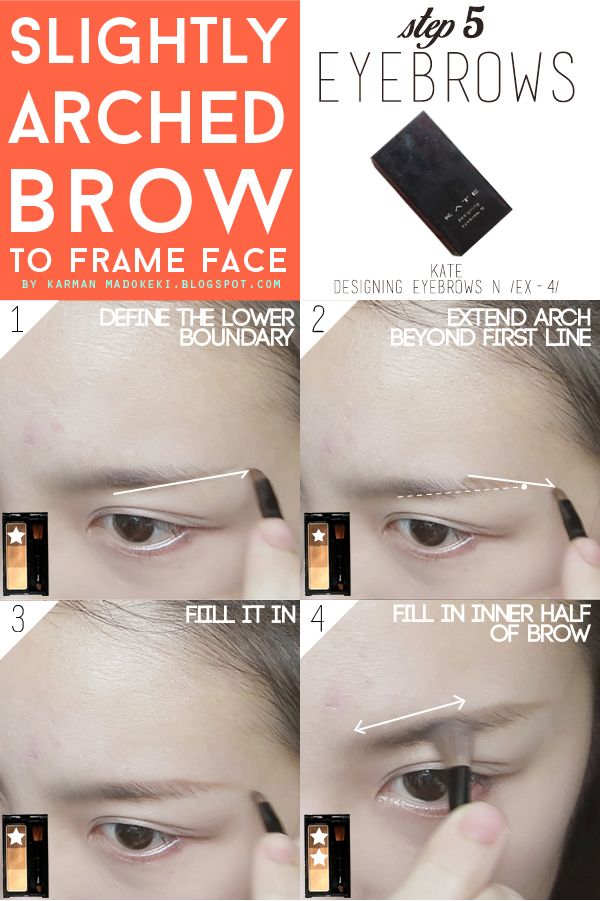
click on image to enlarge!
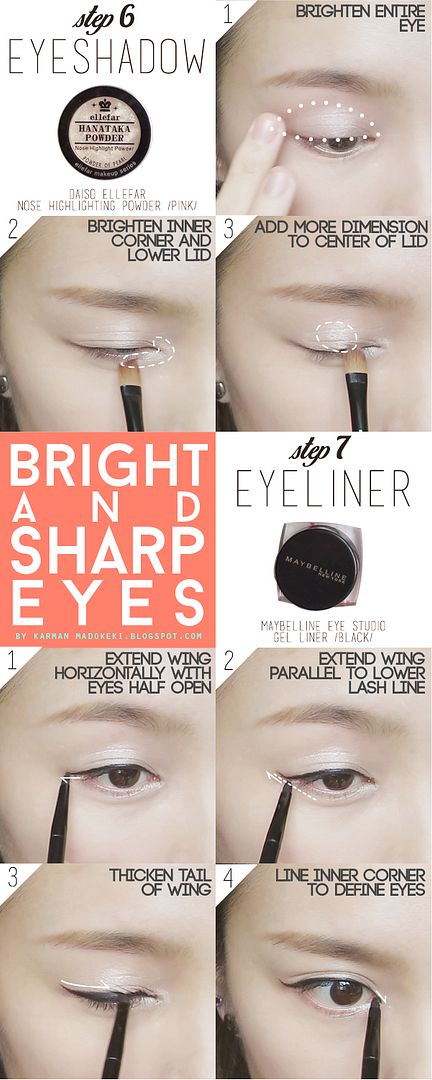
click on image to enlarge!
i did the demure kitten eyeliner here (but a little thicker and a longer wing), you can choose any eyeliner that complements your eyes :)
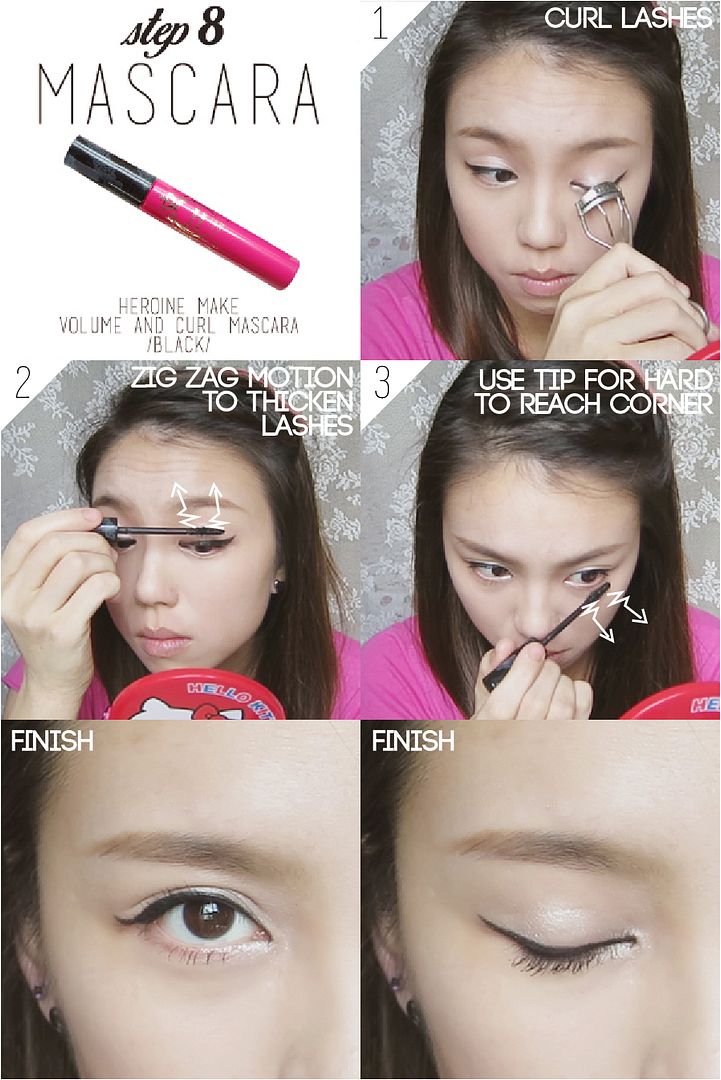
click on image to enlarge!MUST curl lashes to open up the eyes. it's VERY VERY important if you want your eyes to appear brighter and more awake behind the frames.
STEP 3: CHEEKS AND LIPS
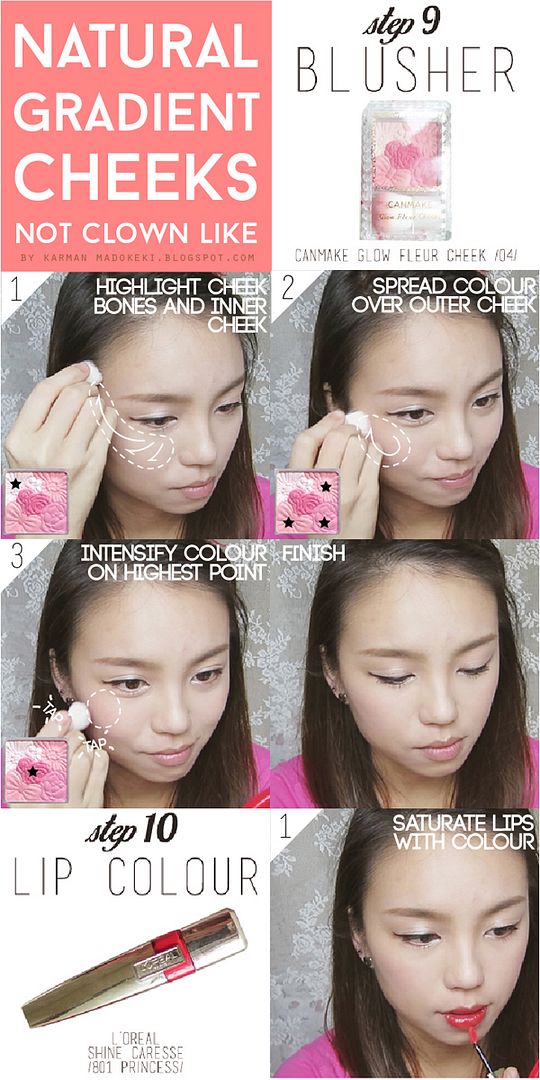
click on image to enlarge!
if you only have a single colour blusher, you can still apply the same "gradient effect" rules, like in my previous tutorial where i spread a bit of colour over my entire cheek before going back in to intensify it. don't worry if you don't have the lip stain/lacquer/whatever you call it, use a lipstick and add gloss over it. we want a vibrant lip for this look.
i also made an instagram version :D
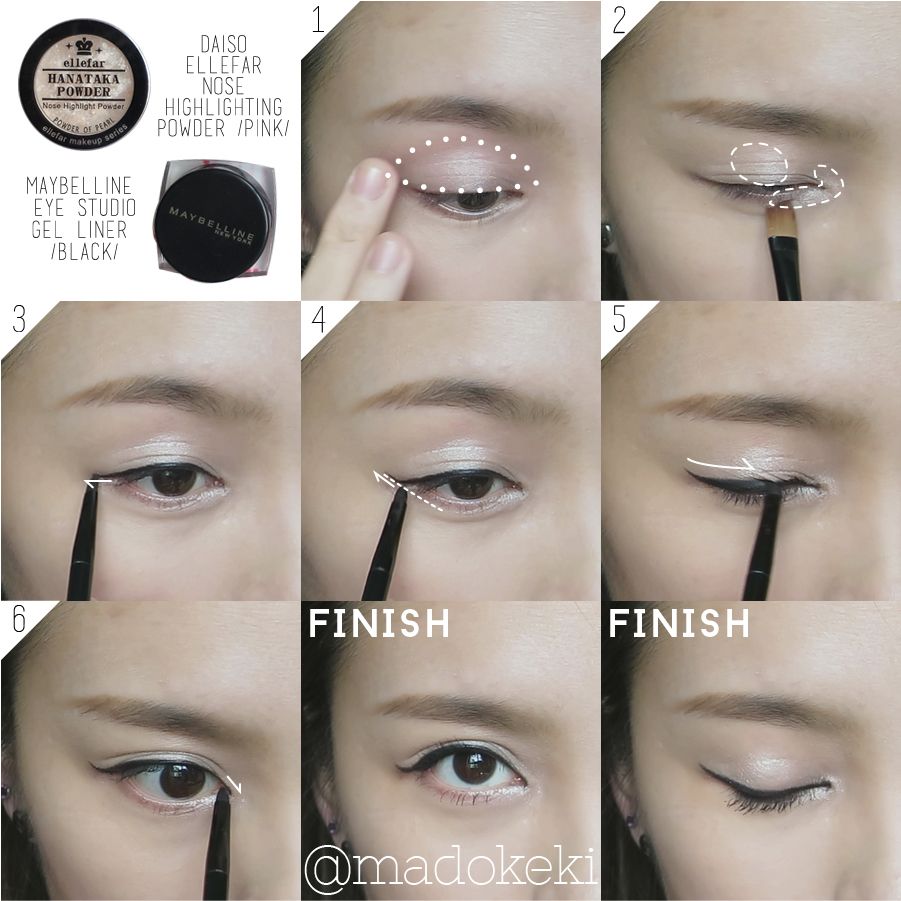
click on image to enlarge!
FINISHED LOOK____________________________________________________________
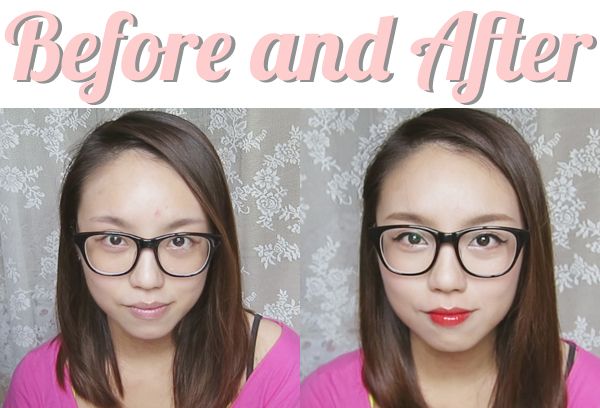
from sleepy nerd to awake nerd :D
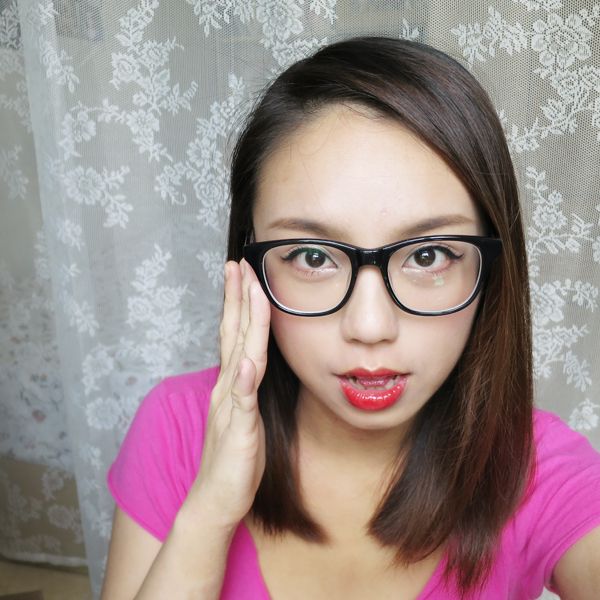
close up on face.
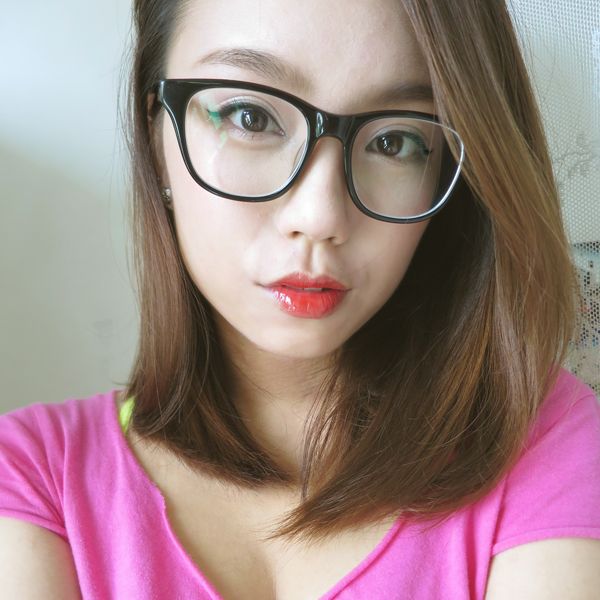
close up on face.
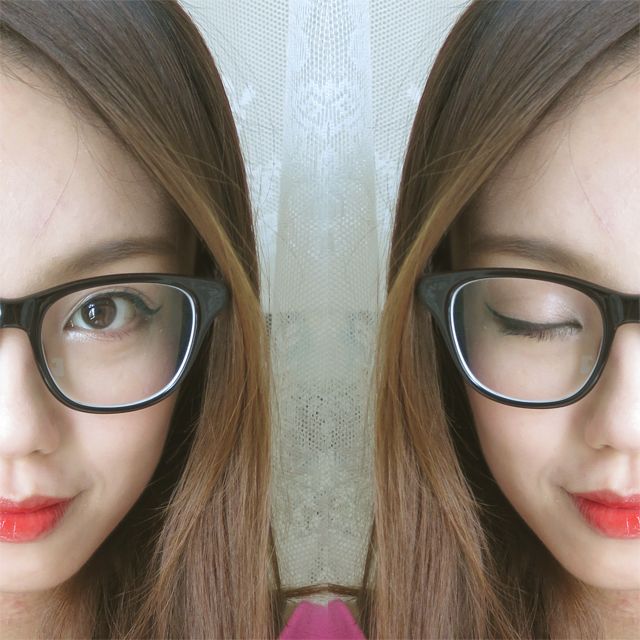
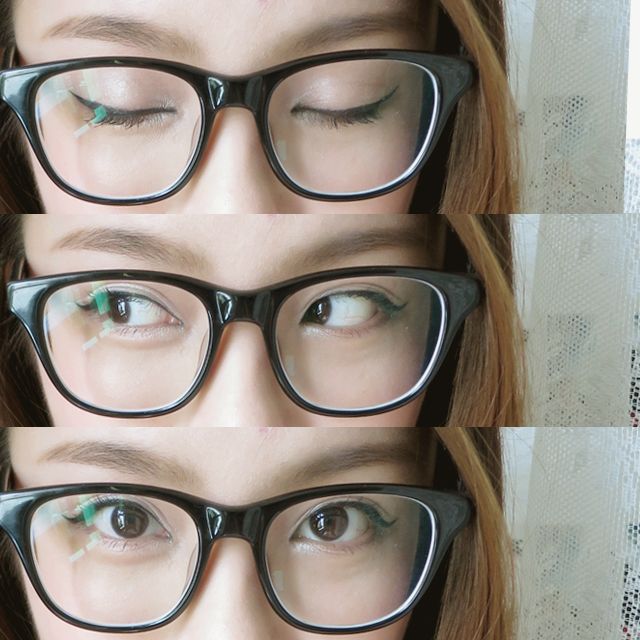
so here are my tips on makeup for glasses! hope it helped you in some way or another ;)
if you tried this look out, take a photo, share it on instagram and tag me @madokeki, because i'd love to see your version of it! remember to always tweak the makeup looks to suit yourself!
xoxo
karman
Tidak ada komentar:
Posting Komentar