
HOW TO: Shape and Groom Eyebrow (For Beginners)
previously i talked about how to fill in eyebrows to get the korean style straight eyebrows, i realize it wasn't very helpful as that assumes you've already shaped your brow according. and then i figured.. if you need help filling in your eyebrows, you probably need some guidance on shaping it too.
this tutorial is to build on that so as to prepare your eyebrow for the filling in.
i've showed 2 different styles of eyebrow trimming here, the first is a natural looking eyebrow that harnesses your original eyebrow shape, if you do have some eyebrow to begin with, you can get away with excessive filling in and drawing with the first method since the shaping already gets your eyebrow looking neater and more defined.
the second one is pertaining to korean style eyebrow, and it branches out further into 2 ways on how to get it.
watch the video here!
PRODUCTS USED____________________________________________________________
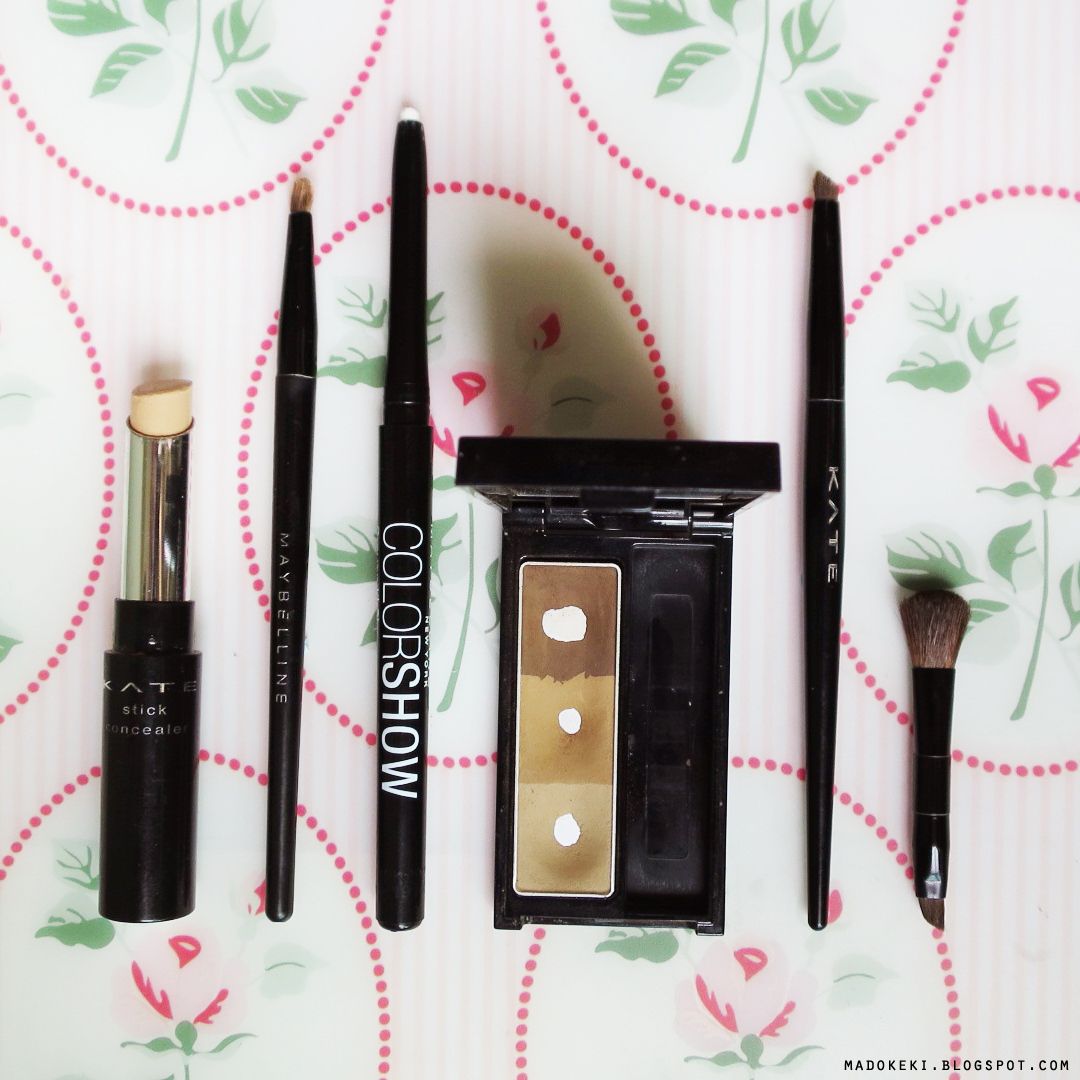
from left to right:
1. KATE stick concealer (light beige)
2. MAYBELLINE eyeliner brush
3. MAYBELLINE colorshow crayon kohl (snow white)
4. KATE designing eyebrow N (EX-4)
5. KATE eyeliner brush (cut into an angled brush by me)
6. KATE dual end brush (using the fluffy one for blending)
TOOLS USED
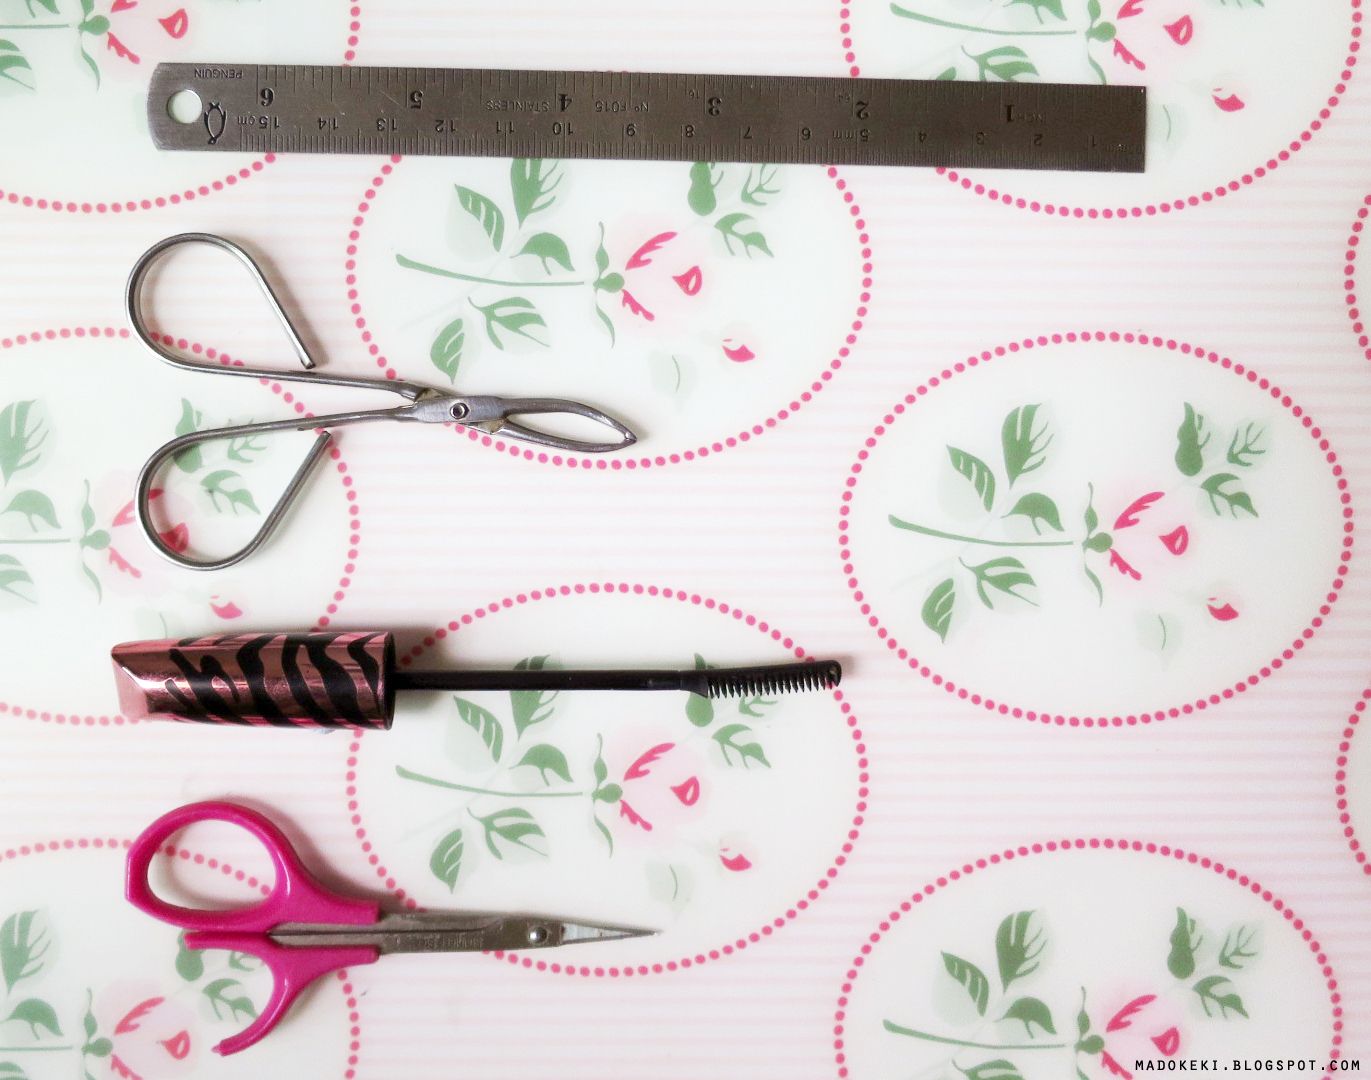
top to bottom:
1. ruler (or any other straight objects)
2. tweezer (or a razor if you're afraid of over tweezing)
3. spoolie (recycled from maybelline cat eyes mascara)
4. scissors
PICTORIAL_________________________________________________________________
in case you didn't catch these in the video, they are permanently here for your reference:
Getting the line of references:
i called this the loci rule because these lines are basically locus where the points of our desired eyebrow lie on.
STEP 1: START OF BROW
some guides suggest that the start of the brow should lie on the line vertically above the side of the nose, but that's not a law, it's just a guide. i prefer my brows to look closer to each other so as to create the illusion of a more defined nose bridge.
the idea here is this:
narrower nose bridge = closer eyebrows = use any point between the tip of your nose and the side of your nose as the reference point to draw the vertical line.
wider nose bridge =further eyebrows = use the side of your nose as the reference point.
STEP 2: FINDING THE ARCH
i've aligned the side of my nose and the side of my iris to get line 2. some guides asks you to align the side of the nose to the centre of the iris instead. it's up to you.
STEP 3: DEFINING THE END OF THE BROW
this is straight forward! align the side of the nose to the end of your eye.
after finding out the 3 lines, you can proceed on to either the natural brow or the korean style brow below.
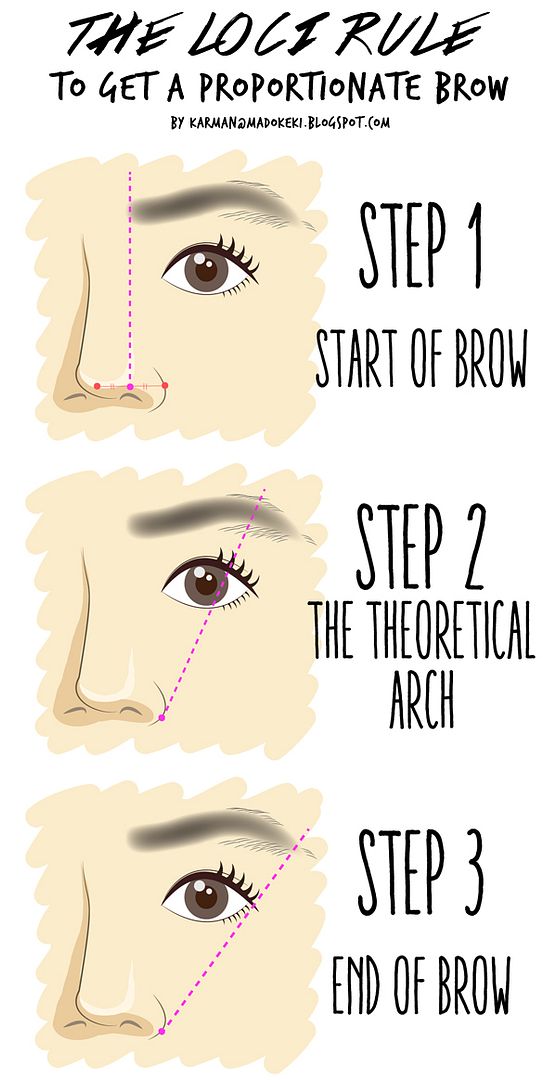
click on image to enlarge!
NATURAL LOOKING BROW
STEP 4: IDENTIFYING 4 POINTS ON THE LOCI
to get a natural looking brow, use your original eyebrow as a guide. the first three points that will define the upper limit of your brow should be the intersection between the loci and your original eyebrow's upper limit. you can change where the end of your eyebrow is depending on what you fancy, i tried to keep it within my own brows so i don't have to draw the end of the brow should it exist on an place with no brow hair.
the last point would be the lower limit of the start of your brow, it should also intersect with your original brow.
STEP 5: CONNECT THE DOTS
the upper limit should be easy, just connect the 3 dots together. for the lower limit, start from the singular dot at the bottom and draw an line that is parallel to the line above, until it hits line 2.
STEP 6: COMPLETE THE BOX AND SHAPE
remove hair outside the box, fill in whatever empty space (if you have any) inside the box. there shouldn't be much empty space unless your brow is naturally shorter than it should be.
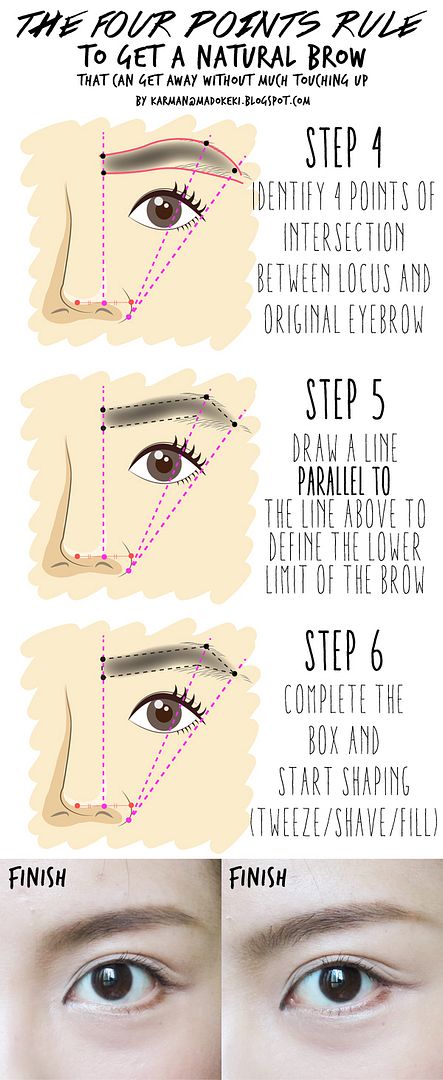
click on image to enlarge!
KOREAN STRAIGHT EYEBROW
after defining the three loci from the steps above, you can carry on here if you prefer straighter eyebrows.
the one on the left is for you if you want your brow to be higher (which also means you will have more lid space, but don't take this too far up or you look too shocked all the time), while the one on the right will make the eyebrow appear lower and closer to your eyes.
as i would prefer my eyebrows to look slightly higher, i used the steps on the left when shaping my eyebrow.
STEP 1:
LEFT (HIGHER EYEBROW) uses the top of your natural arch as the reference point to find out all the other points.
RIGHT (LOWER EYEBROW) uses the top of your the start of your brow as the reference point.
for both methods, you get to choose where you want the end of your brow is by picking any point along line 3. i suggest to keep it within your original eyebrow.
THE REST OF THE STEPS ARE PRETTY STRAIGHTFORWARD.

click on image to enlarge!
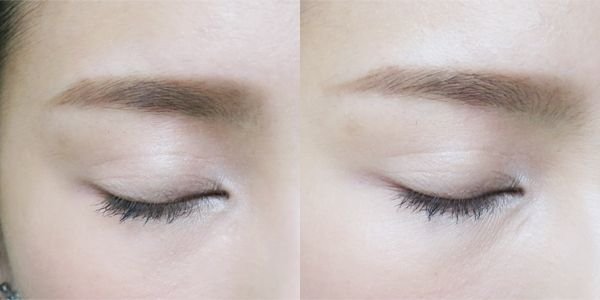
final look of the korean style eyebrow at two different angles, front and side.
the truth is, i use a mixture of the two styles to get me a versatile eyebrow. i trim my eyebrow using the natural method so as to retain most of my original eyebrow shape. when i fill in, i can change my brows very slightly get get me different looks for the day.
please experiment and test out which style suits you the best! this is just a guide, it gives you a starting point to kick start the iteration process. i didn't end up in this brow in a single try, what you see now is actually months of tweaking this and that until i found one that suits me the best currently.
hope you found this useful! :D
xoxo
karman
Tidak ada komentar:
Posting Komentar